Getting Started | Cataloguing | Data Dictionary | Searching | Team
Getting Started
Accessing the Mediapedia server
The catalogue component of the Mediapedia is accessed thru a copy of
the FileMaker Pro database application – version 8.5 or greater.
All the Mediapedia files are stored on the central Mediapedia server.
To install either a demo or a complete copy of FileMaker Pro please
refer to the application’s installation instructions for your
computer platform.
Why FileMaker? It is a cross platform database that is easily amenable
to rapid visual database development and deployment to the internet
without extensive programming skills.
Starting Mediapedia
Having first negotiated access permission to the Mediapedia server, one
only then needs to start their local copy of the FileMaker application.
• From the File menus select ‘Open Remote’
• From the resulting dialog box’s View menu select Favorite
Hosts from the dropdown list
• If connecting for the first time you will need to Add the Mediapedia server’s
IP address to the Favorite Hosts list:
[]
The initial Home screen presents a series of buttons and shortcut links to various aspects of the database.
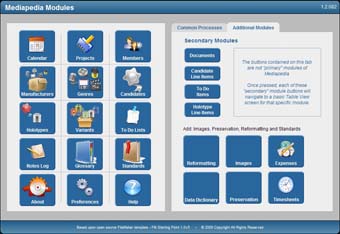
Figure 1: Home
The Mediapedia Navigational Tools
Understanding the layout of the various Mediapedia screens will assist
in learning the features of the program. The following diagrams show
the major layouts along with the names of the different screens and
their elements.
By hovering the mouse pointer over most items on the various layouts you will see a pop-up Tool Tip identifying the item in question.
Toolbars
Depending upon the version of FileMaker which you are running the
system toolbar and its options may vary somewhat. All illustrations are
given utilising the current version 10.
In FileMaker version 10, the Status Toolbar utilised in previous versions has been moved to the top of the screen from the left-hand side. Additional features have also been incorporated to increase usability.

Figure 2: Toolbar - FileMaker Pro 10
Please consult your FileMaker Help menu or PDF users guide for a complete explanation of the various navigational and functional components shown.
Within the screen layouts for most sections of the Mediapedia database the sub navigational ‘tab’ navigation metaphor has been heavily utilised as nested menu tabs within menu tabs.

Figure 3: Navigation
The general navigation between the various database modules is accomplished via the main menu module buttons across the top of the screen window.
Additional windows can be opened and used to
illustrate or work on different parts of the database independently
from the initial window.
• To open another window of the existing window; from the system
toolbar Window menu item select New Window.
• To open an additional window of another module, while holding
down, the ALT key on Windows
or the Option key on a Mac,
click on the module button at the top of the screen for the module you
wish to access to initiate a pop-up window of that module.

Figure 3b:
Navigation between records is activated by clicking on the ‘book’ pages to take one forward or backwards thru the record pages.
Screen Layouts
The various screen layouts on offer for each module vary but most include the following common ones which can be accessed via the menu tabs.
Form View
The Form view is most often the type of layout one arrives at when
changing modules. This layout enables quick access to basic information
and common tasks for a particular record, such as creating new records,
editing existing records, finding or referencing illustrative images.
The Form view screen gives you the most information about any one item. It also provides access to all the sub-menus accessed via a series of tabs and their sub-tabs.
Some fields have ‘value lists’ (drop-down lists), to access commonly used terms. These fields have a downward pointing arrow on their right hand side. A few have small square tick boxes to toggle selection.
The other layouts can be accessed via the drop-down Layout menu in the top panel or via the Tabs and sub-tabs within the layout on the screen.
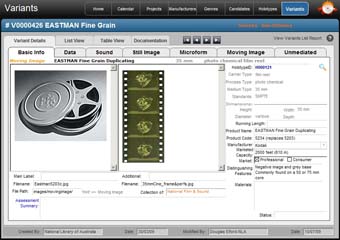
Figure 4 : Variants Basic Info form view
List View
The List View provides a thumbnail image of the item along with some
basic descriptive information for multiple items at once.
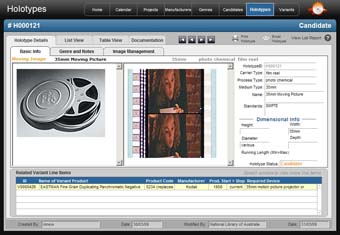
Figure 5: Variants List view
Records can be sorted via the ‘Sort by’ menu located within the column name shown at the top of the list’s columns.
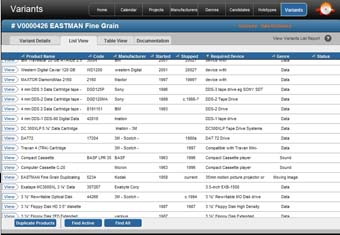
Figure 6: Column Sort buttons in Variants
List view
Table View
The Table View provides a series columns of information for all module
fields scrolling off to the right very much like a spreadsheet view.
Again, the columns can be sorted by right-clicking on the column name.
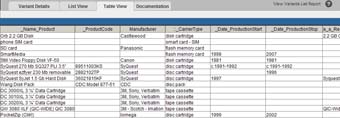
Figure 7: Variants Table view
Cataloguing - see next section
